Domain and 2FA Authentication
Authentication with Active Directory
The AD configuration should be done in the /etc/logserver/properties.yml
file.
Below is a list of settings to be made in the properties.yml file
(the commented section in the file for the AD settings to
start working, this fragment should be uncommented):
ldaps:
 - name: "example.com"  # domain that is configured
   host: "127.0.0.1,127.0.0.2"  # list of server for this domain
   #port: 389 # optional, default 389 for unencrypted session or 636 for encrypted sessions
   ssl_enabled: false  # optional, default true
   #ssl_trust_all_certs: true # optional, default false
   #ssl.keystore.file: "path" # path to the truststore store
   #ssl.keystore.password: "path" # password to the trusted certificate store
   bind_dn: "admin@example.com" # account name administrator
   bind_password: "password" # password for the administrator account
   search_user_base_DN: "OU=lab,DC=example,DC=com" # search for the DN user tree database
   #user_id_attribute: "uid # search for a user attribute optional, by default "uid"
   #search_groups_base_DN: "OU=lab,DC=example,DC=com" # group database search. This is a catalog main, after which the groups will be sought.
   #unique_member_attribute: "uniqueMember" # optional, default "uniqueMember"
   connection_pool_size: 10 # optional, default 30
   connection_timeout_in_sec: 10 # optional, default 1
   request_timeout_in_sec: 10 # optional, default 1*
   cache_ttl_in_sec: 60 # optional, default 0 - cache disabled
   #authentication_only: true    # optional ignore role-mapping settings
   #default_authentication_roles: [ "roleName1", "roleName2" ]      # roles asigned to new users authenticating using this LDAP server, used when authentication_only = true
If we want to configure multiple domains, then in this configuration file we copy the # LDAP section below and configure it for the next domain.
Below is an example of how an entry for 2 domains should look like. (It is important to take the interpreter to read these values correctly).
ldaps:
  - name: "example1.com" #DOMAIN 1
    host: "127.0.0.1,127.0.0.2"
    bind_dn: "esauth@example1.com"
    bind_password: "password"
    search_user_base_DN: "cn=Users,DC=example1,DC=com"
    ssl_enabled: false
  - name: "example2.com" #DOMAIN 2
    host: "127.0.0.1,127.0.0.2"
    bind_dn: "esauth@example2.com"
    bind_password: "password"
    search_user_base_DN: "cn=Users,DC=example2,DC=com"
    ssl_enabled: false
After completing the LDAP section entry in the properties.yml file,
save the changes and reload the module with the below command:
curl -sS -uUSER:PASSWORD localhost:9200/_logserver/auth/reload -XPOST
Example:
curl -sS -ulogserver:logserver localhost:9200/_logserver/auth/reload -XPOST
Configure SSL support for AD authentication
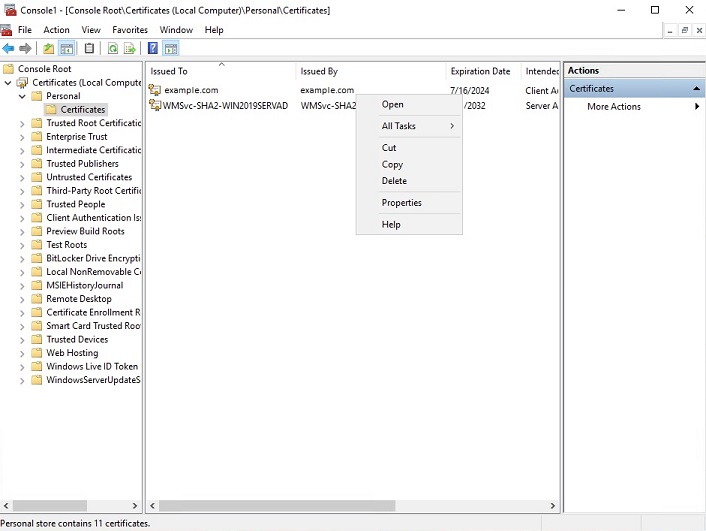
Open the certificate manager on the AD server.
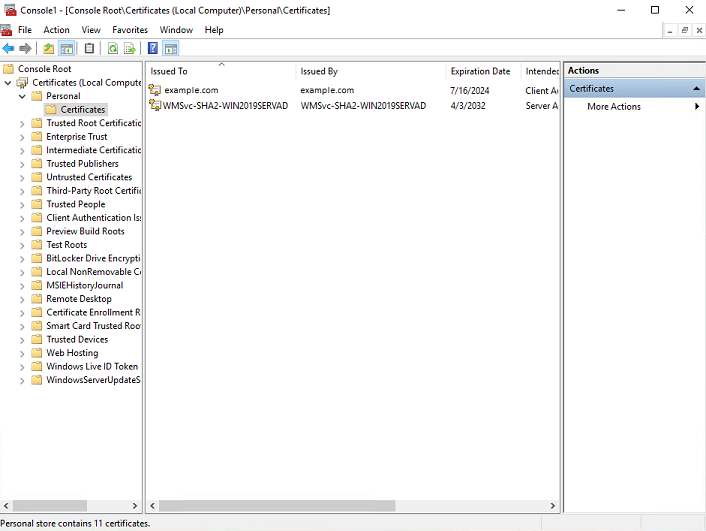
Select the certificate and open it
Select the option of copying to a file in the Details tab
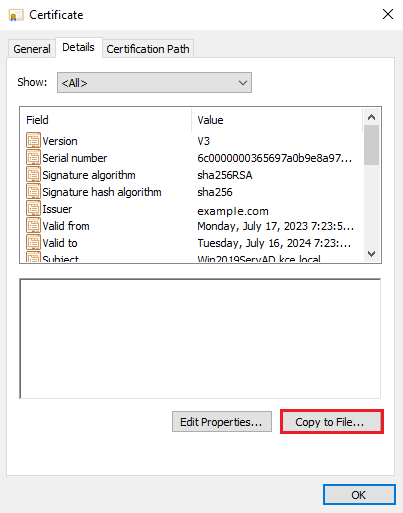
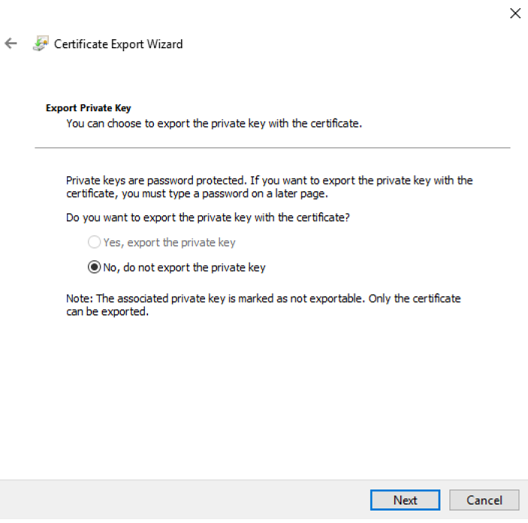
Click the Next button
Keep the setting as shown below and click Next
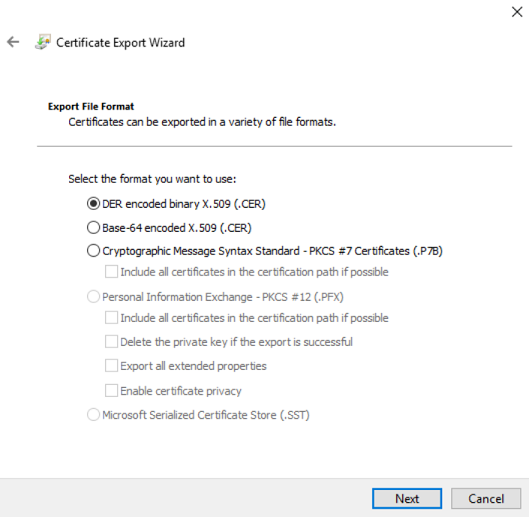
Keep the setting as shown below and click Next.
Give the name a certificate
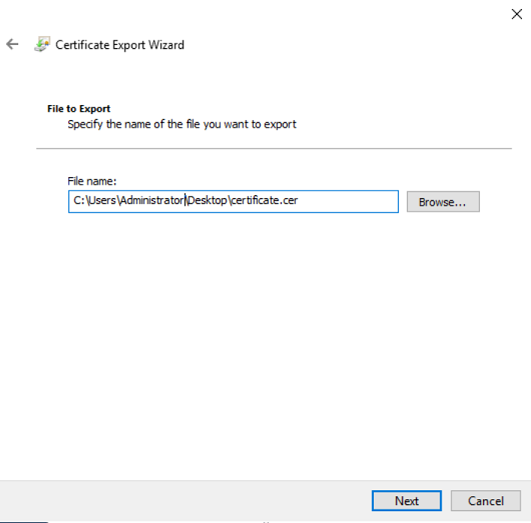
After the certificate is exported, this certificate should be imported into a trusted certificate file that will be used by the Data Node plugin.
To import a certificate into a trusted certificate file, a tool called „keytool.exe” is located in the JDK installation directory.
Use the following command to import a certificate file:
keytool -import -alias adding_certificate_keystore -file certificate.cer -keystore certificatestore
The values certificate.cer and certificatestore should be changed accordingly.
By doing this, it will ask you to set a password for the trusted
certificate store. Remember this password, because it must be set in
the configuration of the Data Node plugin. The following settings
must be set in the properties.yml configuration for
SSL:
 ssl.keystore.file: "<path to the trust certificate store>"
 ssl.keystore.password: "<password to the trust certificate store>"
Role mapping
In the /etc/logserver/properties.yml configuration file you can find
a section for configuring role mapping:
# LDAP ROLE MAPPING FILE
# rolemapping.file.path: /etc/logserver/role-mappings.yml
This variable points to the file /etc/logserver/role-mappings.yml
Below is the sample content for this file:
# admin - superuser group
admin:
  - "CN=Admins,CN=Builtin,DC=example,DC=com"

gui-access:
  - "CN=Admins,CN=Builtin,DC=example,DC=com"
Attention. The role you define in the role-mapping.yml file must be created in the Energy Logserver.
How does the mapping mechanism work?
An AD user logs in to Energy Logserver. In the application, there is a gui-access role, which through the file role-mapping.yml binds to the name of an AD group of which the user is a member. Additionally, this AD group binds to the Energy Logserver admin role, which points to permission granted to the user in the application.
Similarly, the mechanism will work for any other role in the application. Important in this configuration is to add every AD group to gui-access which grants permission to log in and at least one more role which grants permission to some data.
The gui-access role is not visible in GUI, it’s only used to grant permission to log in.
If field authentication_only is true, user roles will not be mapped and they will be taken from the default_authentication_roles field. When the default_authentication_roles field is not added in properties.yml, a user without a role will be created.
Below is a screenshot of the console on which are marked accounts that were created by users logging in from AD
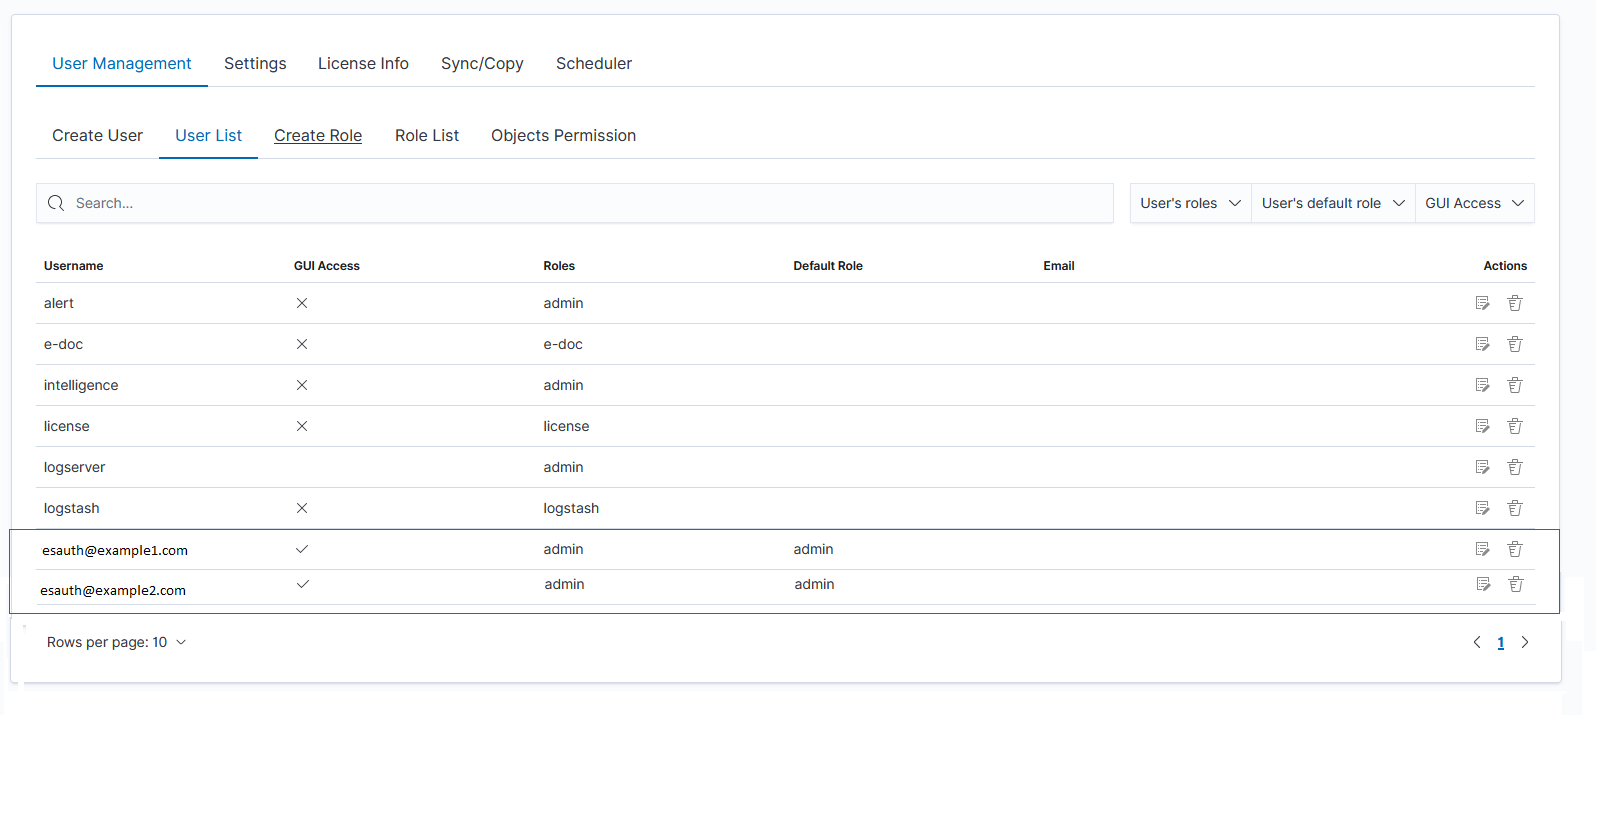
If you map roles from several domains, for example, dev.example1.com, and dev.example2.com then in the User List we will see which user from which domain with which role logged in Energy Logserver.
Password encryption
For security reasons, you can provide the encrypted password for Active Directory integration.
To do this use pass-encrypter.sh script that is located in the Utils directory in the installation folder.
Installation of pass-encrypter
cp -pr /installation_folder/logserver/pass-encrypter /usr/share/logserver/
Use pass-encrypter
/usr/share/logserver/utils/pass-encrypter/pass-encrypter.sh

Enter the string for encryption :
new_password
Encrypted string : MTU1MTEwMDcxMzQzMg==1GEG8KUOgyJko0PuT2C4uw==
Authentication with Radius
To use the Radius protocol, install the latest available version of Energy Logserver.
Configuration
The default configuration file is located at /etc/logserver/properties.yml:
# Radius opts
#radius.host: "10.4.3.184"
#radius.secret: "querty1q2ww2q1"
#radius.port: 1812
Use appropriate secret based on config file in Radius server. The secret is configured on clients.conf in the Radius server.
In this case, since the plugin will try to do Radius auth, the client IP address should be the IP address where the Data Node is deployed.
Every user by default at present gets the admin role
Authentication with LDAP
To use OpenLDAP authorization, install or update Energy Logserver too at least 7.0.2.
LDAP Configuration
The default configuration file is located at /etc/logserver/properties.yml:
ldap_groups_search - Enable Open LDAP authorization. The
ldap_groups_searchswitch with true/false values.search filter - you can define
search_filterfor each domain. When polling the LDAP / AD server, the placeholder is changed to theuserId(everything before @domain) of the user who is trying to log in. Sample search_filter:search_filter: "(&(objectClass=inetOrgPerson)(cn=%s))"
If no search_filter is given, the default will be used:
(&(&(objectCategory=Person)(objectClass=User))(samaccountname=%s))
max_connections - for each domain (must be> = 1), this is the maximum number of connections that will be created with the LDAP / AD server for a given domain. Initially, one connection is created, if necessary another, up to the maximum number of connections set. If max_connections is not given, the default value = 10 will be used.
ldap_groups_search - filter will be used to search groups on the AD / LDAP server to which the user is trying to log in. An example of groups_search_filter that works quite universally is:
groups_search_filter: "(|(uniqueMember=%s)(member=%s))"
Sample configuration:
licenseFilePath: /usr/share/logserver/

ldaps:

    - name: "dev.it.example.com"
      host: "192.168.0.1"
      port: 389                                                  # optional, default 389
      #ssl_enabled: false                                        # optional, default true
      #ssl_trust_all_certs: true                                 # optional, default false
      bind_dn: "Administrator@dev2.it.example.com"
      bind_password: "password"
      search_user_base_DN: "OU=lab,DC=dev,DC=it,DC=example,DC=pl"
      search_filter: "(&(objectClass=inetOrgperson)(cn=%s))"     # optional, default "(&(&(objectCategory=Person)(objectClass=User))(samaccountname=%s))"
      user_id_attribute: "uid"                                   # optional, default "uid"
      search_groups_base_DN: "OU=lab,DC=dev,DC=it,DC=example,DC=pl" # base DN, which will be used for searching user's groups in LDAP tree
      groups_search_filter: "(member=%s)"                        # optional, default (member=%s), if ldap_groups_search is set to true, this filter will be used for searching user's membership of LDAP groups
      ldap_groups_search: false                                  # optional, default false - user groups will be determined basing on user's memberOf attribute
      unique_member_attribute: "uniqueMember"                    # optional, default "uniqueMember"
      max_connections: 10                                        # optional, default 10
      connection_timeout_in_sec: 10                              # optional, default 1
      request_timeout_in_sec: 10                                 # optional, default 1
      cache_ttl_in_sec: 60                                       # optional, default 0 - cache disabled
When the password is longer than 20 characters, we recommend using our pass-encrypter, otherwise, the backslash must be escaped with another backslash. Endpoint
role-mapping/_reloadhas been changed to_role-mapping/reload. This is a unification of API conventions, following Data Node conventions.
Configuring Single Sign On (SSO)
To configure SSO, the system should be accessible by domain name URL, not IP address or localhost.
Correct: https://loggui.com:5601/login
Wrong: https://localhost:5601/login, https://10.0.10.120:5601/login
The configuration description described below is based on:
AD Domain / Realm:
example.comAD IP Address:
192.168.3.111GUI Url:
loggui.com
To enable SSO on your system, follow the steps below.
Configuration steps
Create a User Account for Data Node auth plugin
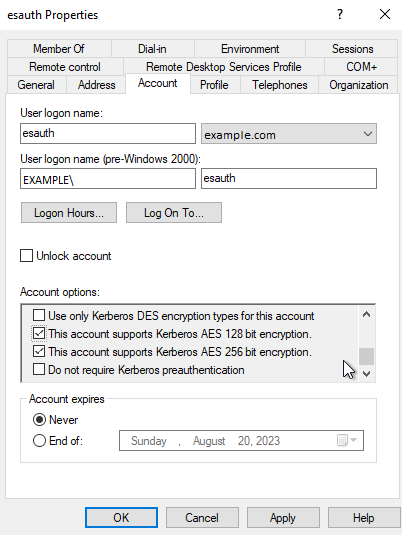
In this step, a Kerberos Principal representing the Data Node auth plugin is created on the Active Directory. The principal name would bename@EXAMPLE.COM, while theEXAMPLE.COMis the administrative name of the realm.Create a User in AD. Set “Account never expires” and enable support for Kerberos encryption as shown below.
Define the Service Principal Name (SPN) and Create a keytab file for it
Use the following command to create the keytab file identifying the SPN:
C:> ktpass -out c:\Users\Administrator\esauth.keytab -princ HTTP/loggui.com@EXAMPLE.COM -mapUser esauth -mapOp set -pass 'Sprint$123' -crypto ALL -pType KRB5_NT_PRINCIPAL
Details of the used switches:
-out- path to the keytab file-mapUser- name of the previously created AD user. It might need to be preceded with pre-Windows 2000 logon if user cannot be found (e.g.EXAMPLE\esauthon the screenshot).-princ- service principal name. Must start with uppercase HTTP/ and must end with uppercase domain after the @ sign. Will be used later to configure principal.-pass- password that secures the keytab file itself (not connected user’s password!). Will be used later to configure principal’s password.
For more details about the
ktpass tool, please refer to the official documentation: ktpass details.The
esauth.keytabfile should be placed on your Data Node node - preferably/etc/logserver/with read permissions for Data Node user:chmod 640 /etc/logserver/esauth.keytab chown user: /etc/logserver/esauth.keytab
Create a file named krb5Login.conf:
  com.sun.security.jgss.initiate {
      com.sun.security.auth.module.Krb5LoginModule required
      principal="HTTP/loggui.com@EXAMPLE.COM"
      useKeyTab=true
      keyTab=/etc/logserver/esauth.keytab
      storeKey=true
      debug=true;
    };
  com.sun.security.jgss.krb5.accept {
    com.sun.security.auth.module.Krb5LoginModule required
    principal="HTTP/loggui.com@EXAMPLE.COM"
    useKeyTab=true
    keyTab=/etc/logserver/esauth.keytab
    storeKey=true
    debug=true;
  };
The principal user and keyTab location should be changed as per the values created in Step 2. Make sure the domain is in UPPERCASE as shown above.
Thekrb5Login.conffile should be placed on your Data Node node, for instance,/etc/logserver/with read permissions for the Data Node user:sudo chmod 640 /etc/logserver/krb5Login.conf sudo chown user: /etc/logserver/krb5Login.conf
Uncomment and edit JVM arguments, in
/etc/logserver/jvm.options.d/single-sign-logon.optionsas shown below:-Dsun.security.krb5.debug=false \ -Djava.security.krb5.realm=**EXAMPLE.COM** \ -Djava.security.krb5.kdc=**192.168.3.111** \ -Djava.security.auth.login.config=/etc/logserver/krb5Login.conf \ -Djavax.security.auth.useSubjectCredsOnly=false
Change the
.krb5.realmand.krb5.kdcto the appropriate values.Realmis defined as used domain (must be in UPPERCASE) realm and.kdcis AD’s IP address. Those JVM arguments have to be set for the Logserver server.
Authentication options if
authentication_only: trueis setIf a user does not exist, Logserver will create the user without a role. Role in
role-mapping.ymlwould be ignored and rolegui-accessfromdefault_authentication_roles: ["gui-access"]will be assigned.Add the following additional (sso.domain, service_principal_name, service_principal_name_password) settings for LDAP in properties.yml file:
sso.domain: "example.com"
ldaps:
  - name: "example.com"
    host: "IP_address"
    port: 389                                      # optional, default 389
    ssl_enabled: false                             # optional, default true
    ssl_trust_all_certs: false                     # optional, default false
    bind_dn: "esauth@example.com"                  # optional, skip for anonymous bind
    bind_password: "password"                      # optional, skip for anonymous bind (AD admin's password)
    search_user_base_DN: "cn=Users,DC=example,DC=com"
    user_id_attribute: "uid"                       # optional, default "uid"
    unique_member_attribute: "uniqueMember"        # optional, default "uniqueMember"
    service_principal_name: "HTTP/loggui.com@EXAMPLE.COM" # principal name used while generating the keytab file
    service_principal_name_password: "Sprint$123"  # -pass used during keytab creation
Note: At this moment, SSO works for only a single domain. So you have to mention for what domain SSO should work in the above property
sso.domain- in this example it should be “example.com”.After completing the LDAP section entry in the properties.yml file, save the changes and send a request for reload authentication data with the command:
curl -sS -u username:password localhost:9200/_logserver/auth/reload -XPOST
Enable the SSO feature in the
logserver-gui.ymlfile:login.sso_enabled: true
After that Logserver GUI has to be restarted with systemctl restart command
Client (Browser) Configuration
Internet Explorer configuration
Go to
Internet Optionsfrom theToolsmenu and click onSecurityTab:
Select
Local intranet, click onSite->Advanced-> Provide correct URL -> ClickAdd: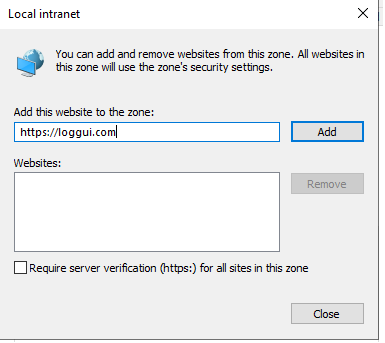
After adding the site click close.
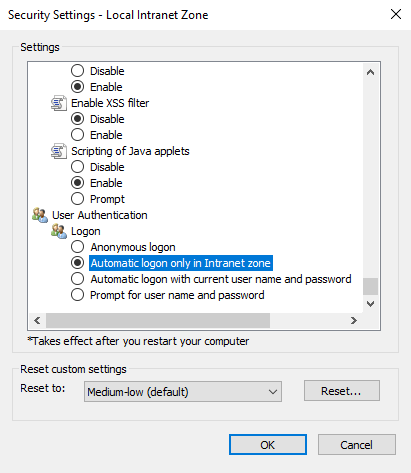
Click on the custom level and select the option as shown below:
Chrome configuration
For Chrome, the settings are taken from the IE browser.
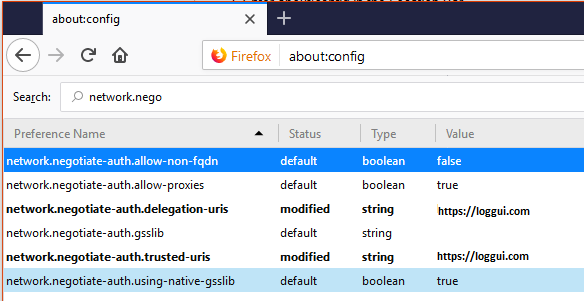
Firefox Configuration
Update the following config:
KDC error codes
| KDC error codes | Description |
|---|---|
| 0 | No error |
| 1 | Client entry is expired |
| 2 | Server entry is expired |
| 3 | Protocol version is not supported |
| 4 | Client key is encrypted in an old master key |
| 5 | Server key is encrypted in an old master key |
| 6 | Client is not defined in the security registry |
| 7 | Server is not defined in the security registry |
| 8 | Principal is not unique in the security registry |
| 9 | No key is available for the principal |
| 10 | Ticket is not eligible for postdating |
| 11 | Ticket is never valid |
| 12 | Request rejected due to KDC policy |
| 13 | Request option is not supported |
| 14 | Encryption type is not supported |
| 15 | Checksum type is not supported |
| 16 | Preauthentication type is not supported |
| 17 | Transited data type is not supported |
| 18 | Client account is revoked |
| 19 | Server account is revoked |
| 20 | TGT is revoked |
| 21 | Client account is not valid yet |
| 22 | Server account is not valid yet |
| 23 | Password is expired |
| 24 | Preauthentication failed |
| 25 | Preauthentication required |
| 26 | Supplied authentication ticket is not for the requested server |
| 27 | Server requires user-to-user protocol |
| 31 | Decryption integrity check failed |
| 32 | Ticket is expired |
| 33 | Ticket is not valid yet |
| 34 | Request is a replay of a previous request |
| 35 | Supplied authentication ticket is not for the current realm |
| 36 | Ticket and authenticator do not match |
| 37 | Clock skew is too great |
| 38 | Incorrect network address |
| 39 | Protocol version mismatch |
| 40 | Invalid message type |
| 41 | Message stream has been modified |
| 42 | Message is out of order |
| 44 | Key version is not available |
| 45 | Service key is not available |
| 46 | Mutual authentication failed |
| 47 | Incorrect message direction |
| 48 | Alternative authentication method required |
| 49 | Incorrect message sequence number |
| 50 | Inappropriate checksum type |
| 60 | Generic error detected |
| 61 | Field is too long |
| 62 | Client certificate is not acceptable |
| 63 | KDC certificate is not trusted or does not meet requirements |
| 64 | Certificate signature not valid |
| 65 | Client Diffie-Hellman key parameters not accepted |
| 70 | Client certificate could not be verified |
| 71 | Client certificate chain validation error occurred |
| 72 | Client certificate chain contains a revoked certificate |
| 73 | Revocation status for the certificate chain could not be determined |
| 75 | Kerberos client name does not match name bound to the client certificate |
| 76 | Kerberos KDC name does not match name bound to the KDC certificate |
| 77 | Key purpose restricts certificate usage |
| 78 | Certificate signature digest algorithm is not supported |
| 79 | PKAuthenticator is missing the required paChecksum |
| 80 | The signedData digest algorithm is not supported |
| 81 | The Public Key encryption delivery method is not supported |
Two-Factor Authentication
Two-factor authentication (2FA) adds an additional verification layer on top of the standard Energy Logserver credentials. The two approaches below place NGINX in front of the Logserver-GUI (ELS Console, default port 5601) and delegate the second factor to an external mechanism — either an OAuth2 identity provider or a client X.509 certificate.
2FA with OAuth2 Proxy and Google (example)
This integration uses oauth2-proxy as an authentication gateway between NGINX and Google as the identity provider.
Software used:
NGINX — distribution package, or official NGINX repository (https://nginx.org/en/linux_packages.html)
oauth2-proxy — https://github.com/oauth2-proxy/oauth2-proxy/releases
NGINX configuration:
Create
/etc/nginx/conf.d/ng_oauth2_proxy.confwith the content below. The default server certificate and key generated by the Energy Logserver RPM are/etc/kibana/ssl/logserver-gui.crtand/etc/kibana/ssl/logserver-gui.key; replacelogserver.org.crt/logserver.org.keyaccordingly or keep your organisation’s own certificate paths.server { listen 443 default ssl; server_name logserver.local; ssl_certificate /etc/kibana/ssl/logserver.org.crt; ssl_certificate_key /etc/kibana/ssl/logserver.org.key; ssl_session_cache builtin:1000 shared:SSL:10m; add_header Strict-Transport-Security max-age=2592000; location /oauth2/ { proxy_pass http://127.0.0.1:4180; proxy_set_header Host $host; proxy_set_header X-Real-IP $remote_addr; proxy_set_header X-Scheme $scheme; proxy_set_header X-Auth-Request-Redirect $request_uri; } location = /oauth2/auth { proxy_pass http://127.0.0.1:4180; proxy_set_header Host $host; proxy_set_header X-Real-IP $remote_addr; proxy_set_header X-Scheme $scheme; proxy_set_header Content-Length ""; proxy_pass_request_body off; } location / { auth_request /oauth2/auth; error_page 401 = /oauth2/sign_in; auth_request_set $user $upstream_http_x_auth_request_user; auth_request_set $email $upstream_http_x_auth_request_email; proxy_set_header X-User $user; proxy_set_header X-Email $email; auth_request_set $token $upstream_http_x_auth_request_access_token; proxy_set_header X-Access-Token $token; auth_request_set $auth_cookie $upstream_http_set_cookie; add_header Set-Cookie $auth_cookie; auth_request_set $auth_cookie_name_upstream_1 $upstream_cookie_auth_cookie_name_1; if ($auth_cookie ~* "(; .*)") { set $auth_cookie_name_0 $auth_cookie; set $auth_cookie_name_1 "auth_cookie__oauth2_proxy_1=$auth_cookie_name_upstream_1$1"; } if ($auth_cookie_name_upstream_1) { add_header Set-Cookie $auth_cookie_name_0; add_header Set-Cookie $auth_cookie_name_1; } proxy_pass https://127.0.0.1:5601; } }
Set
ssl_certificateandssl_certificate_keyto the certificate and key you intend to serve.
When SSL is terminated by NGINX, the Logserver-GUI can be started over HTTP. If encryption on the upstream is required, adjust proxy_pass accordingly.
oauth2-proxy configuration:
Prepare
oauth2_proxy.cfg.Create directories for the binary and configuration:
mkdir -p /usr/share/oauth2_proxy/
mkdir -p /etc/oauth2_proxy/
Copy files into directories:
cp oauth2_proxy /usr/share/oauth2_proxy/
cp oauth2_proxy.cfg /etc/oauth2_proxy/
Set directives according to the OAuth configuration created in the Google Cloud project:
client_id =
client_secret =
# the following limits domains for authorization (* - all)
email_domains = [
  "*"
]
Set the public hostname:
cookie_domain = "logserver-host.org"
Optional — restrict login to a specific Google group:
Create a service account: https://developers.google.com/identity/protocols/OAuth2ServiceAccount
Download the service account credentials as a JSON file and copy the Client ID.
In the Google Cloud console go to APIs & Services → APIs, and enable the Admin SDK API.
Follow https://developers.google.com/admin-sdk/directory/v1/guides/delegation#delegate_domain-wide_authority_to_your_service_account and grant the service account the following OAuth scopes:
https://www.googleapis.com/auth/admin.directory.group.readonly
https://www.googleapis.com/auth/admin.directory.user.readonly
Follow https://support.google.com/a/answer/60757 to grant Admin API access.
Select or create an administrative email in the Gmail domain — this is the value for
google-admin-email.Select or create the group used for login — this is the value for
google-group.Copy the downloaded JSON file to
/etc/oauth2_proxy/.In
oauth2_proxy.cfgset the path to the JSON credentials:google_service_account_json =
Service start-up:
Start the NGINX service.
Start the oauth2-proxy service:
/usr/share/oauth2_proxy/oauth2_proxy -config="/etc/oauth2_proxy/oauth2_proxy.cfg"
Open a browser and navigate to the Energy Logserver host address — authentication is now delegated to Google.
2FA with Nginx and PKI client certificate
This integration places NGINX in front of the Logserver-GUI (ELS Console) and requires clients to present a valid X.509 certificate signed by a dedicated internal CA. On RHEL/Rocky/AlmaLinux the NGINX package from nginx.org runs under the nginx user and group.
1. Install NGINX
Follow the official NGINX installation guide: https://docs.nginx.com/nginx/admin-guide/installing-nginx/installing-nginx-open-source/
2. Create the client-certificate signing CA
Create a directory for the CA material:
cd /etc/nginx
mkdir CertificateAuthCA
cd CertificateAuthCA
chown root:nginx /etc/nginx/CertificateAuthCA/
chmod 770 /etc/nginx/CertificateAuthCA/
These permissions grant the user root (or the privileged user on your box) and the nginx group access. No one else should read this directory — it holds the root signing key.
Generate the CA private key. You will be prompted for a passphrase:
openssl genrsa -des3 -out myca.key 4096
Generate a CA certificate valid for 10 years (adjust as required; you will be prompted for CA attributes):
openssl req -new -x509 -days 3650 -key myca.key -out myca.crt
3. Create a client keypair
Repeat for each user — this can be scripted as part of user provisioning. You will be prompted for a passphrase, which will be distributed to the user together with the certificate.
Note: Never distribute the passphrase of the root CA private key from step 2.
openssl genrsa -des3 -out testuser.key 2048
openssl req -new -key testuser.key -out testuser.csr
Sign the client certificate with the CA. Valid for one year by default; increment the serial if you need to reissue:
openssl x509 -req -days 365 -in testuser.csr -CA myca.crt -CAkey myca.key -set_serial 01 -out testuser.crt
For Windows clients, combine the key material into a single PFX file (you will be prompted for the passphrase set above):
openssl pkcs12 -export -out testuser.pfx -inkey testuser.key -in testuser.crt -certfile myca.crt
Including the public portion of the CA in the PFX allows Windows to trust the internally signed CA.
4. Prepare the NGINX site certificate
Tighten directory permissions before generating site material:
chown -R root:nginx /etc/nginx/CertificateAuthCA
chmod 700 /etc/nginx/CertificateAuthCA
Generate the server key (you will be prompted for a passphrase and attributes):
openssl genrsa -out ./domain.com.key 2048
Create a CSR:
openssl req -new -sha256 -key ./domain.com.key -out ./domain.com.csr
Sign the server certificate:
openssl x509 -req -days 365 -in domain.com.csr -CA myca.crt -CAkey myca.key -set_serial 01 -out domain.com.crt
Remove the passphrase from the server key (you will be prompted for the passphrase set above):
openssl rsa -in domain.com.key -out domain.com.key.nopass
Create the NGINX sites-available directory and an empty configuration file:
cd /etc/nginx
mkdir sites-available
cd sites-available
touch proxy.conf
5. NGINX site configuration
Make sure firewalld is installed and enabled. Paste the following into proxy.conf:
server {
    listen 443;  ## The listen port must match the firewall rule.
    ssl on;
    server_name 192.168.3.87;  ## Your IP as server_name
    proxy_ssl_server_name on;
    ssl_certificate        /etc/nginx/CertificateAuthCA/domain.com.crt;        ## Server certificate
    ssl_certificate_key    /etc/nginx/CertificateAuthCA/domain.com.key.nopass; ## Server key (passphrase removed)
    ssl_client_certificate /etc/nginx/CertificateAuthCA/myca.crt;              ## CA certificate used to verify client certs

    ssl_verify_client on;

    ## Optionally capture error codes and redirect to a custom page:
    ## error_page 495 496 497 https://someerrorpage.yourdomain.com;

    ssl_prefer_server_ciphers on;
    ssl_protocols TLSv1.1 TLSv1.2;
    ssl_ciphers 'ECDHE-RSA-AES128-GCM-SHA256:ECDHE-ECDSA-AES128-GCM-SHA256:ECDHE-RSA-AES256-GCM-SHA384:ECDHE-ECDSA-AES256-GCM-SHA384:kEDH+AESGCM:ECDHE-RSA-AES128-SHA256:ECDHE-ECDSA-AES128-SHA256:ECDHE-RSA-AES128-SHA:ECDHE-ECDSA-AES128-SHA:ECDHE-RSA-AES256-SHA384:ECDHE-ECDSA-AES256-SHA384:ECDHE-RSA-AES256-SHA:ECDHE-ECDSA-AES256-SHA:DHE-RSA-AES128-SHA256:DHE-RSA-AES128-SHA:DHE-RSA-AES256-SHA256:DHE-DSS-AES256-SHA:AES128-GCM-SHA256:AES256-GCM-SHA384:ECDHE-RSA-RC4-SHA:ECDHE-ECDSA-RC4-SHA:RC4-SHA:HIGH:!aNULL:!eNULL:!EXPORT:!DES:!3DES:!MD5:!PSK';

    keepalive_timeout 10;
    ssl_session_timeout 5m;

    location / {
        proxy_set_header X-Forwarded-For $proxy_add_x_forwarded_for;
        proxy_set_header Host $http_host;
        proxy_redirect off;
        proxy_set_header X-Forwarded-Proto https;
        proxy_pass http://localhost:5601/;   ## proxy_pass for Logserver-GUI (ELS Console)
    }
}
6. Enable the site in NGINX
nginx.conf loads modular configs from /etc/nginx/conf.d/*.conf. Create a symlink:
cd /etc/nginx
ln -s /etc/nginx/sites-available/proxy.conf /etc/nginx/conf.d/proxy.conf
7. Restart NGINX
systemctl restart nginx
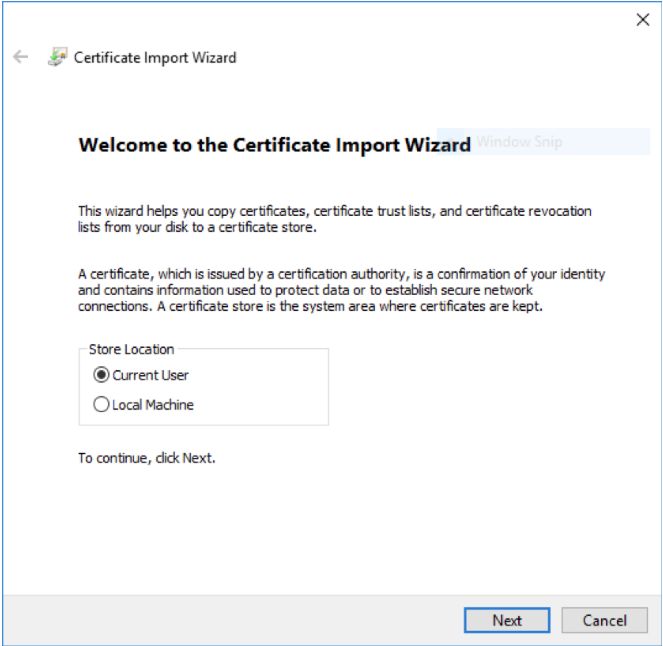
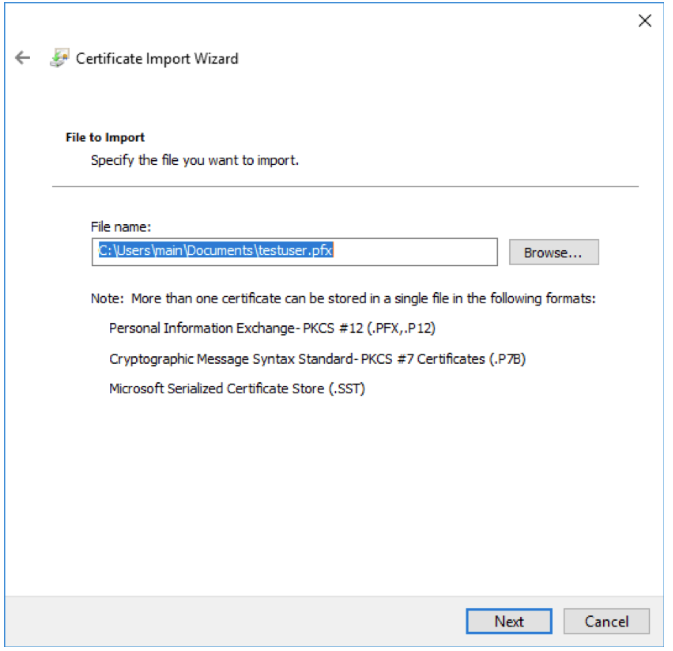
8. Import the client certificate on a Windows machine
Double click the .pfx file and select Current User.
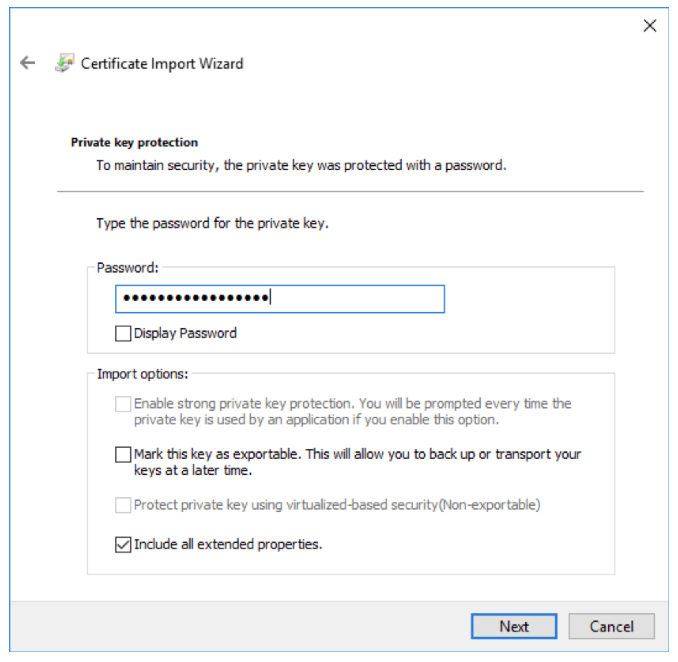
If the PFX has a passphrase, enter it here. Otherwise leave it blank and continue.
Add the target site to Trusted Sites in Internet Explorer. This allows the client certificate to be sent to the site (trusting it in Internet Explorer also trusts it in Chrome).
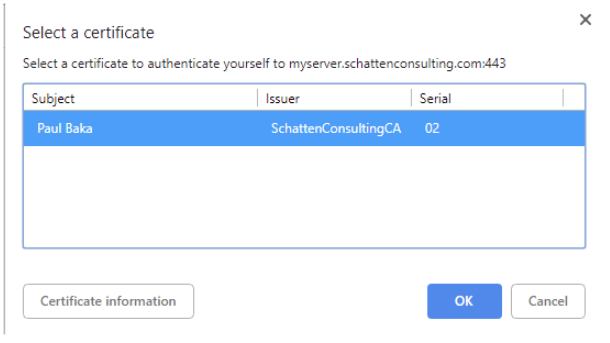
On the next visit the browser prompts to select a client certificate. Select the imported one and confirm.